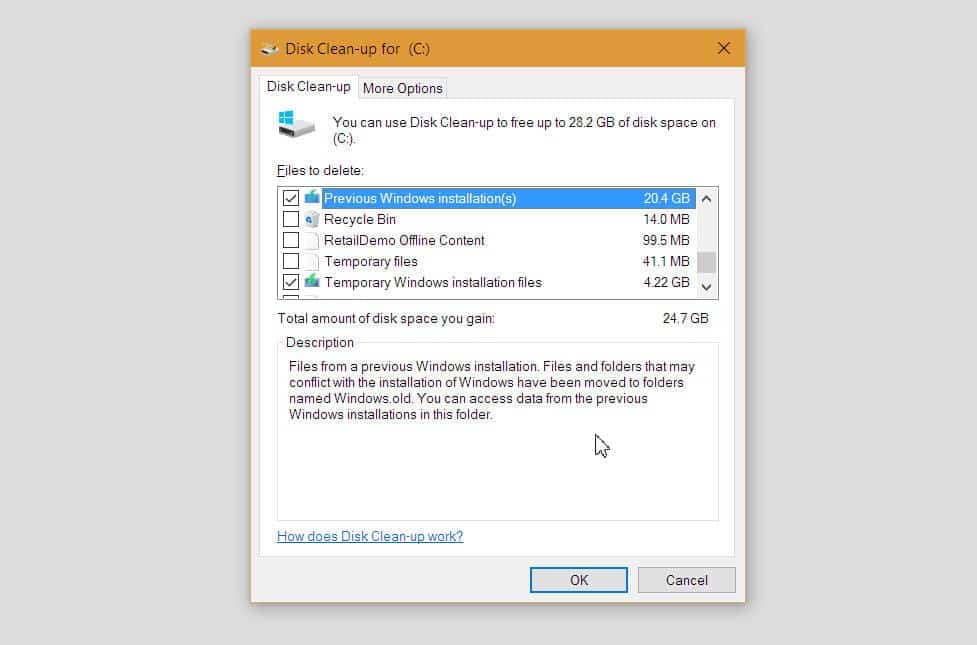
However, the rewards that you will receive are well worth the investment of your time. After the installation process has been completed, you have the option to free up slightly more than 24GB of space, which can be seen in the image below this text. If you want to gain some extra space, particularly if you are running Windows 10 on a solid state drive with insufficient amount of storage, it is definitely something that you should look into. Given below are the steps that you should take to complete this process: Be warned, the files that you are about to remove are used to roll back to the previous installation of Windows 10. Removing these files will negate this option, so before proceeding, be very careful on what you are about to do.
- Click on Start 2. Type ‘Disk Cleanup’ in the search bar 3. When the option shows up, launch the ‘Disk Clean-up’ application 4. Make sure that you have selected the drive which has stored your Windows 10 installation 5. After selecting that drive, click on ‘Ok’ 6. Click on the ‘Clean up system files’ button 7. Select your system drive once more, and then click on the Ok button once more The tool will be able to calculate the amount of space you can save. This will include 20GB plus space. Check this box, as well as the ‘Temporary Windows installation files’ too. This will free up an additional 4GB of space. If you want to remove these, then click on ‘Ok’ to remove those backed up files and gain additional space. If you have gained additional space, then tell us what you thought about this really cool feature.